In today's digital age, knowing how to control Raspberry Pi remotely has become an essential skill for hobbyists, developers, and tech enthusiasts alike. Whether you're managing home automation systems, monitoring remote sensors, or running complex IoT projects, the ability to access your Raspberry Pi from anywhere can significantly enhance your productivity and convenience. This article will guide you step-by-step through the process of setting up remote access to your Raspberry Pi, ensuring you can control it effortlessly from any location.
With its affordability and versatility, the Raspberry Pi has revolutionized the way we approach technology. From beginners to advanced users, this compact device offers endless possibilities for innovation. However, the real power lies in being able to control Raspberry Pi remotely, enabling you to manage your projects without physical access to the device.
This guide is designed to provide you with all the necessary information and tools to set up remote access effectively. We'll cover essential topics such as configuring SSH, using VNC, setting up a static IP, and exploring additional security measures to keep your system safe. By the end of this article, you'll have the confidence and knowledge to control your Raspberry Pi remotely like a pro.
Read also:Arikytsya Rising Star In The Music Industry
Table of Contents
- Introduction
- What is Raspberry Pi?
- Why Control Raspberry Pi Remotely?
- Setting Up Remote Access
- Assigning a Static IP Address
- Port Forwarding
- Security Measures
- Troubleshooting Common Issues
- Advanced Techniques
- Conclusion
What is Raspberry Pi?
The Raspberry Pi is a credit-card-sized computer designed to promote learning and innovation in computing. Developed by the Raspberry Pi Foundation, this single-board computer has gained immense popularity due to its affordability, versatility, and ease of use. It supports a wide range of applications, from simple programming tasks to complex projects involving artificial intelligence, robotics, and IoT.
Understanding what Raspberry Pi is and its capabilities is crucial before diving into how to control Raspberry Pi remotely. This device runs on various operating systems, with Raspberry Pi OS being the most commonly used. It features multiple ports, including USB, HDMI, and Ethernet, making it compatible with a wide array of peripherals.
Why Control Raspberry Pi Remotely?
Controlling Raspberry Pi remotely offers numerous advantages, especially for users who manage projects from different locations. Here are some compelling reasons why you should consider setting up remote access:
- Convenience: Access your Raspberry Pi from anywhere in the world, eliminating the need for physical presence.
- Efficiency: Monitor and manage multiple devices simultaneously without switching between them physically.
- Flexibility: Perform tasks such as file transfers, software updates, and system maintenance remotely.
- Cost-Effectiveness: Reduce the need for additional hardware by leveraging your existing devices for remote access.
Whether you're a developer working on a remote project or a homeowner managing smart devices, remote control capabilities can significantly enhance your experience with Raspberry Pi.
Setting Up Remote Access
Setting up remote access to your Raspberry Pi involves several steps, each designed to ensure seamless and secure connectivity. Below, we'll explore the most common methods for achieving this goal.
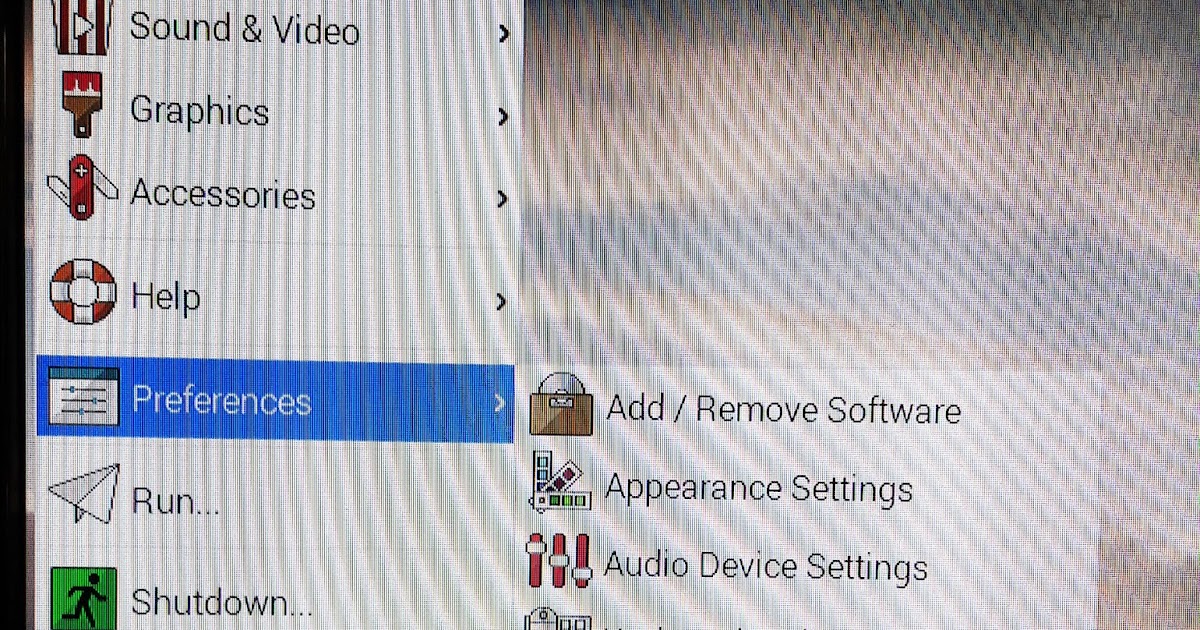
Configure SSH
SSH (Secure Shell) is one of the most popular methods for controlling Raspberry Pi remotely. It allows you to access the command-line interface securely from another device. Here's how to set it up:
Read also:Natalie Portman Look Alike Unveiling The Remarkable Resemblances
- Enable SSH on your Raspberry Pi by navigating to
Raspberry Pi Configurationin the desktop menu or by using the commandsudo raspi-config. - Connect your Raspberry Pi to the same network as your remote device.
- Use an SSH client, such as PuTTY (Windows) or the built-in terminal (Linux/Mac), to connect to your Raspberry Pi using its IP address.
SSH provides a secure and efficient way to manage your Raspberry Pi remotely, making it an ideal choice for most users.
Use VNC
If you prefer a graphical interface, VNC (Virtual Network Computing) is an excellent alternative. It allows you to view and interact with your Raspberry Pi's desktop remotely. Follow these steps to set it up:
- Install the VNC Server on your Raspberry Pi by running
sudo apt install realvnc-vnc-server. - Enable VNC through the
Raspberry Pi Configurationmenu or by using the commandsudo raspi-config. - Download and install the VNC Viewer app on your remote device.
- Connect to your Raspberry Pi using its IP address and login credentials.
VNC offers a user-friendly interface, making it a great option for those who are more comfortable with graphical environments.
Assigning a Static IP Address
Assigning a static IP address to your Raspberry Pi ensures that its network address remains consistent, making it easier to connect remotely. To do this:
- Open the terminal on your Raspberry Pi and run
sudo nano /etc/dhcpcd.conf. - Add the following lines at the end of the file, replacing
XX.XX.XX.XXwith your desired IP address:interface eth0static ip_address=XX.XX.XX.XX/24static routers=YY.YY.YY.YYstatic domain_name_servers=ZZ.ZZ.ZZ.ZZ
- Save the file and reboot your Raspberry Pi using
sudo reboot.
A static IP address eliminates the risk of IP conflicts and ensures stable connectivity, especially when using port forwarding.
Port Forwarding
Port forwarding allows you to access your Raspberry Pi from outside your local network. To set it up:
- Log in to your router's admin interface using its IP address and login credentials.
- Navigate to the
Port ForwardingorVirtual Serverssection. - Create a new rule, specifying the following details:
- Service Port: The port you want to use for remote access (e.g., 22 for SSH).
- Internal IP Address: The static IP address of your Raspberry Pi.
- Internal Port: The port number on your Raspberry Pi (e.g., 22 for SSH).
- Save the changes and test the connection from an external network.
Port forwarding is a powerful tool, but it should be used with caution to avoid potential security risks.
Security Measures
When controlling Raspberry Pi remotely, ensuring the security of your system is paramount. Below are some best practices to protect your device:
Firewall Configuration
Configuring a firewall can help prevent unauthorized access to your Raspberry Pi. Use the ufw (Uncomplicated Firewall) tool to set up basic rules:
- Install
ufwby runningsudo apt install ufw. - Allow specific ports, such as SSH, using commands like
sudo ufw allow 22. - Enable the firewall with
sudo ufw enable.
A properly configured firewall acts as a barrier against potential threats, enhancing the security of your Raspberry Pi.
Use SSH Keys
Using SSH keys instead of passwords adds an extra layer of security to your remote access setup. Here's how to generate and use SSH keys:
- Generate a key pair on your remote device by running
ssh-keygen. - Copy the public key to your Raspberry Pi using
ssh-copy-id pi@raspberrypi.local. - Disable password authentication in the SSH configuration file (
/etc/ssh/sshd_config) by settingPasswordAuthentication no. - Restart the SSH service with
sudo service ssh restart.
SSH keys provide a secure and convenient method for authentication, reducing the risk of brute-force attacks.
Troubleshooting Common Issues
While setting up remote access to your Raspberry Pi, you may encounter some common issues. Here are a few troubleshooting tips:
- Connection Refused: Ensure that SSH or VNC is enabled and that the correct ports are open in your firewall.
- IP Address Not Found: Verify that your Raspberry Pi is connected to the network and has a valid IP address.
- Authentication Failed: Double-check your login credentials and ensure that SSH keys are correctly configured.
If the problem persists, consult the official Raspberry Pi documentation or seek help from online forums and communities.
Advanced Techniques
Once you've mastered the basics of remote access, consider exploring advanced techniques to enhance your experience:
- Remote Desktop Protocol (RDP): Use RDP for a more robust remote desktop solution, especially on Windows-based systems.
- Cloud-Based Solutions: Leverage platforms like ngrok or Remote.it to access your Raspberry Pi securely over the internet without port forwarding.
- Automated Scripts: Develop scripts to automate routine tasks and improve efficiency in managing your Raspberry Pi remotely.
These advanced techniques can take your remote control capabilities to the next level, enabling you to tackle more complex projects with ease.
Conclusion
Learning how to control Raspberry Pi remotely opens up a world of possibilities for tech enthusiasts and professionals alike. By following the steps outlined in this guide, you can set up secure and efficient remote access to your Raspberry Pi, empowering you to manage your projects from anywhere in the world.
We encourage you to share your thoughts and experiences in the comments section below. If you found this article helpful, consider sharing it with your network or exploring other articles on our site. Stay tuned for more guides and tutorials to help you unlock the full potential of your Raspberry Pi!